July 30, 2014

Monarch Butterfly Nails


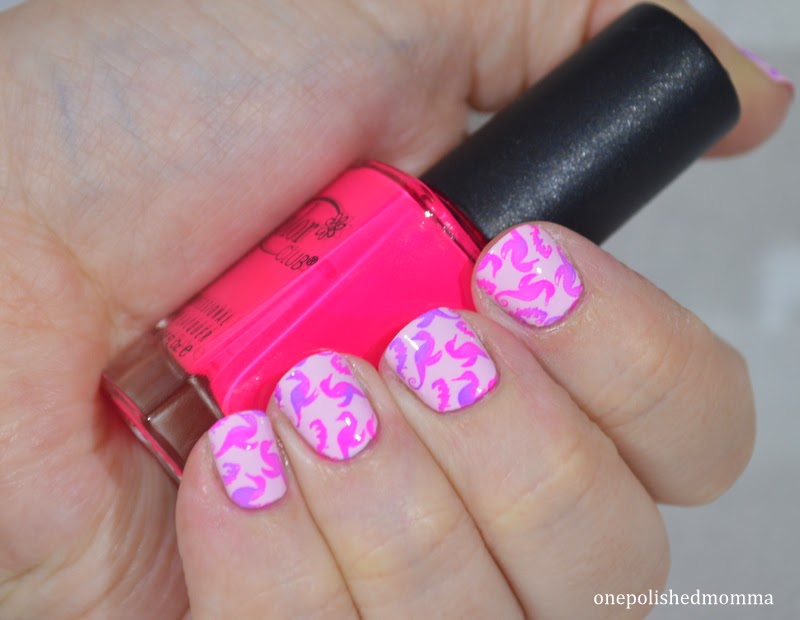
I by no means came up with this design. I have seen it done by a million different people. I did want to try my hand at it though. I think for my first attempt it came out pretty good. I am really ocd with my nails though and I wish my lines were all the same size but I did do these with a toddler running around.

I chose not to use black and white polish. I knew they I wanted something that I could take off without damaging the base color if I needed to. Acrylic paints can be wiped off with rubbing alcohol (a big thank you to Oh My Gosh Polish for that tip.)

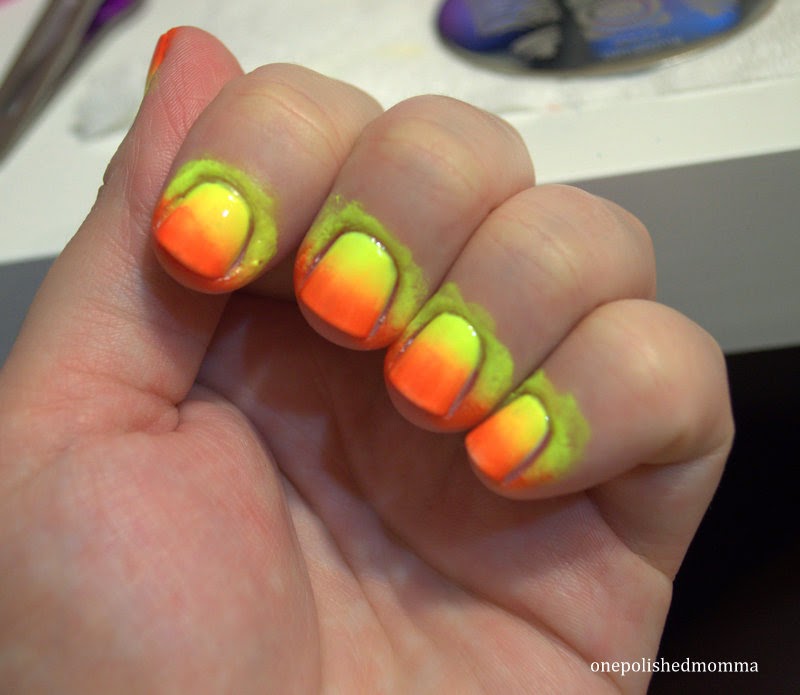
I used my usual base coat and then this gorgeous orange holo polish as my base color. I freehanded the wing design with a art brush I got from Ac Moores. Once the black paint dried I went back in with a small dotting tool and the white paint for the dots. After everything dried I cleaned up and top coated.
Polishes: Duri Rejuvacote as base coat and Color Club Cosmic Fate
Black and white acrylic paint
Top Coat: IMN Out the Door
I love these! They are so sparkly and dainty.
Hope you all are having a great day

 -Samantha


What Day Is It? Hump Day!


I just had to do something funny today. Given that it was Wednesday what would be better then camels. I went in with a very subtle gradient as my base. Unfortunately I don't own a camel color polish. I will have to rectify that!

I use two very similar brown's from Orly for the gradient. I added a layer of top drying top coat to help blend the colors before I stamped. Once it was dry I went in with black and stamped on the camels. I am still working on getting my placement right with the design. My pinkie wasn't quite big enough to fit the whole camel on. I wish I had shrunk him but too late now. After I was finished stamping I felt like it was still missing something so I went in with a sand like glitter. I did the french by hand so they aren't perfect but that's okay.

Polishes: Duri Rejuvacote as base color, Orly's Coffee break and Prince charming for gradient, China Glaze I Herd That for french tip
Stamping Plate: Gals plate #45 stamped with Konad black
Top Coat: IMN Out the Door

July 29, 2014

Black Eternal

I had the hardest time with this design. I had this grand idea in my head to stamp using holographic polish. The first plate I used the stamp wouldn't even pick up. I had to use my Mo-You London plates to get a design. If you look close you can still see that it wasn't 100% crisp.
I won't say much about this because I am just not really happy with it. My camera did not want to pick it up. I had to have taken at least 30 photos and feel like maybe got 5 good ones.
Polishes: Duri Rejuvacote and Wet n Wild Black Creme as base color
Stamping plate: Mo-You London Princess #10 stamped with Color Club Eternal Beauty
Top Coat: Glisten & Glow Hk Girl Topcoat


July 27, 2014

How I Make Finding a Color Easier

When you have as many nail polish bottles as I do you will have a hard time remembering just what each polish looks like. The other day while in Wal-Mart I was over in the office supplies getting my hubby a stapler when I saw these labels.
They are a bit on the larger side but you could cut them in half if you wanted to. All I did was go through and put a swatch of each color on them. Once the polish dried I just stuck it on the top of the bottle. It is pretty simple. I already have an app on my phone that lets me sort by color and brand but it just uses a photo of the bottle itself. I wanted something that when I look on my shelf I can go right for that perfect shade.
As a tip if you are doing several at one time like I did what I suggest is lay the polishes out exactly how you swatch them. So in case you have a few that are similar you don't mix them up when putting on the bottles. I had to redo a couple of my pinks because of that error.
I hope this has been helpful.

-Samantha

July 25, 2014

Cath Kidston Nails

I have seen so many recreations (Alice and Sammy just to name a few) of these nails that I knew I had to try them. I definitely drew more inspiration from Sammy though with the way she had hers laid out. I will admit I really did struggle with these. Way more than I should have I'm sure. I ended up having to go with acrylics for the design because my polishes just kept going goopy on me.
I painted the blue first and went in with white acrylic paint to first do the base for the flowers. After doing the lighter pink I added the darker shade to contrast. Green leaves and the tiny dots finished the look off.
Polishes: Duri rejuvacote and China Glaze Bahamian Escape as base
Assorted acrylics for the design
Top Coat: INM Out the Door

Pattern Inspiration

Lisa Frank Nails

I finally feel pretty darn happy about my stamping abilities. Maybe it's the new plates I have but whatever the reason I am beyond happy with these pretties. I decided to try mixing my colors on the plate to get a multicolored look. I didn't want a typical gradient look though as my nails are on the short side so I was worried not enough room. I just can't seem to stop when it comes to gorgeous neons.
I went in with my pink and purple polishes and just laid down random dots on the stamp. You want to make sure you put a few above the image so that when you stamp you already blend them. I may end up doing a tutorial on this in a future post but it's not really hard to do. Every time I went to stamp I applied them in different spots to change up the lay out. I also would rotate the image before I stamped it on my nail.
Polishes: Duri rejuvacote and Opi's Mod About You as base
Stamping Plate: Mo-You London Sailor plate #04 with Color Club's Warhol and Pucci-licious
Top Coat: Glisten and Glow HK Girl Topcoat

I feel like these should be on a spiral notebook back in the 90's being carried by a girl in middle school. Sorry I was reminiscing there for a bit. Sadly I had to explain Lisa Frank to my husband, but he really liked the design. Hope you all are having a bright and colorful day.


-Samantha

July 16, 2014

Microchipped Nails

Have you ever had a mani turn out a million times better than you had pictured in your head?? This is one of those times for me. A while back I saw that Sammy had this awesome stamping design that she called circuit nails. Once I got in my new Mo-You London plates I knew I was going to have to use the design that looked like microchips. I wanted a shiny green background and black polish on top to make it look as authentic as possible. I used Color Club's Kismet as my base and stamped with Konad black.
Polishes used: Duri rejuvacote base coat and Color Club Kismet
Stamp: Mo-You London Sci-Fi 06 with Konad black
Top Coat: Glisten and Glow HK Girl Topcoat

This may actually be my favorite nail look to date. I can tell I am going to have a hard time taking these bad boys off.


July 14, 2014

Summertime Gradient

I have been really loving the colors from the China Glaze City Flourish Collection. I have used all of them in several manis lately. Today I really wanted to try another gradient. I just knew that Grass is Lime Greener and At Vase Value would be magical together. I was not disappointed. I did lay down a base color of white. I can not remember which one I used but it most likely was Opi's Alpine Snow.
I went in with my makeup sponge and amazingly enough I only had to go over twice to get the opacity that I wanted. After looking at my nails I decided that they needed something else so I broke out the stamping plates.
I didn't want anything that would really take the focus away from the colors. I went with a very simple palm tree in black as accent nails.
Colors used: China Glaze At Vase Value and Grass is Lime Greener
Stamping plate: Winstonia plate in W106 with Konad Black Stamping Polish
Top coat: Glisten and Glow HK Girl Topcoat
I just love how bright this is. I actually got asked by a woman while I was out shopping if these were stickers. I was so proud to say that I did them myself.


Mani Spam

I have a few photos of some manis I have done recently that I didn't think really warranted a blog posting on their own but I still wanted to share them. First up I have a floral design I did a couple days ago. I had originally painted my nails with Opi's You're Such a Budapest. I honestly wish I had just left it as it was. It is one of my favorite purples. The formula is a bitch though. I used several colors of acrylic paints to do the actual design.


Next up I have a paisley design. My base color is Opi's Mod About You. Another gorgeous color with a pain in butt formula. You have to float the brush over your nail to avoid brush strokes in the polish. The stamping image is from Bundle Monster Plate BM315. As per usual I stamped with Konad Black stamping polish.


Lastly I have this Parisian theme mani. After two thin coats of Opi's Alpine Snow I went in with the first stamping plate Cheeky plate Ch6. I used Color Club's Modern Pink to do the stamping. I do wish I had used the pink as a base color and stamped with white instead. Maybe I will redo this and swap the colors around. Once it was dry I used China Glaze's Manhunt with Winstonia plate W114 to add the Eiffel tower. Now I can admit that I kept having so much trouble trying to get the tower where I wanted it. I redid both of my ring fingers at least three times each. I still wasn't 100% happy with my left hand but as it was 3 am I decided to throw in the towel. I love the combo of the pink and blue. I will definitely being using those colors together again in the near future.

*All of the manis have a coat of Glisten and Glow HK Girl Topcoat

Trippy Sun Stamping Tutorial

I have been trying to do more gradients given that I am not as skilled with them as I want to be. Practice makes perfect they say. I broke out my favorite plate again. Winstonia plate W111. I have used this plate several times. My post here uses the same plate just a different image. I did lay down a base color of white. I really wanted my neons to pop. I used two thin coats of Wet n Wild french cream white. I pulled out makeup sponge to do my gradient. I will do more detailed steps on each photo. The colors i used are both Orly polishes, Orange Punch and Glowstick. Technically they don't need a white base coat but they would require more coats to get true to color when doing a gradient. This is my first step by step pictorial so please go easy on me. I am learning. Enjoy!
Lay down several swipes of each color and overlap them slightly to blend

I prefer to roll them over my nails. You may have to do several times

Use a white stamping polish to pick up the image

Try to center the image on your nails then clean up the polish on your skin

Seal with a good top coat and you are done

Stand back and enjoy your neon goodness